Thursday, June 27, 2013

Grilled Avocado Tacos


A couple days ago I intended to make Pita Pizza's.  I even previewed it on instagram... But Hubby used his VETO powers on that.  He is quite honestly the only person I know who really isn't a huge fan of pizza.  He will eat it, but he doesn't ever crave it like normal humans...

Because I still wanted something virtually effortless I changed tactics to suggest our favorite Grilled Avocado Tacos.  Unlike pizza, he never turns down the opportunity for tacos.  EVER!  Just needed to have Josh pick up some avocados, goat cheese, and a chicken breast...and we were good to go!


Ingredients

  • Tortillas- any size
  • 1 can Black Beans (Our pantry already had refried black beans, but you can use whole!)
  • 1 cup cooked Brown Rice
  • Avocados (one for every two hunrgy adults)
  • Goat cheese (or Feta if Hubby buys the wrong crumbly white cheese)
  • Cilantro for garnish
  • 1/2 Tbsp Cumin
  • 1/2 Tbsp Coriander
  • 1/2 Tbsp Red Chili Flakes- shake a little or a lot. 
  • 2 Tbsp Honey (or Agave nectar)
  • 1 Tbsp Lime juice
  • Olive oil
  • Pre cooked chicken for the meat eaters

Directions

  1. Sauce- Honey and lime juice.  That's IT!  I use Tbsp's but just keep a ratio of 2 to 1 with however much you want to make.  This is like lime candy.  You don't need much at all.
  2. Cook your brown rice according to the direction on the container.  Personally, I'm a fan of the instant which takes 1 minute in the microwave.
  3. Add cumin, coriander, and Red chili flakes to your beans and heat up!  Microwave or in a pot.  If you use whole beans, keep some of the liquid so that they stay moist and not clumpy.
  4. Slice your avocados into lengthwise slices that are just thick enough to "hold up" to your handling of them on the grill.  (Too thin and they will fall apart into pieces which are hard to flip!)
  5. Brush your slices with olive oil, and place on a medium heat grill. 
  6. Heat for about 2 minutes a side, resisting the urge to mess with them.  Flip once you've achieved some cute little grill marks and heat the other side the same amount of time.
  7. If you have chicken- heat this up now as well.
  8. Build your tacos!  (we actually made burritos)
  9. Drizzle the honey lime sauce on top sparingly.
  10. Enjoy!
 
Grilled Avocados!
  
Layer of beans

Add some brown rice
Slices of avocado


Crumbled goat cheese (or Feta worked too!)
Tear off some cilantro

Hubbies version with slices of chicken
Wrap it up!!!
I've been making these for a while and am not sure when/how I stumbled across the recipe.  It's been one that I am grateful for finding and I've saved it both on Pinterest and to my "Plan to Eat" recipe/food organizing site (which I highly recommend!)    And while I often change recipes to fit our specific likes, this is one that I pretty much follow without really "Shalon-izing" it.  The original post can be found here, as can way cuter and fancier pictures of the finished tacos!

Monday, June 24, 2013

Grown up "English Muffin-ish" Pizzas (no English Muffins...)

We had a long and fabulous weekend enjoying time with friends and watching my surrogate "little sister" tie the knot.  But I'm TIRED today.  Actually, I am wiped out.  It's like I'm old and can't keep up with late nights, long drives, and fun in the sun.  So this little gem of a dinner recipe is calling my name.  Quite literally.  I can hear it... or maybe I actually am deliriously tired.  Shrug.

OK, so maybe these are not exactly "grown up."  But no doubt they are bigger for your grown up appetite!  This has to be one of the quickest meals ever.  And it's surprisingly good.  Plus nobody would actually disparagingly compare it to an English Muffin version (Sorry Jenn, I know you love those!)  And for my girls with kids old enough to "help" in the kitchen- this one is perfect for you.  You can probably make these straight from your pantry and fridge.  Or with the smallest grocery list ever to pick up the few items you are missing.


Ingredients

  • pita bread- circles, not cut in half  (I use whole wheat)
  • sauce (anything you like that comes in a jar really...)
  • cheese
  • veggies
  • meat (I pretty much always cheat & use deli meat)
**Tonight the recipe will be red sauce, fresh mozzarella, bell peppers, olives, and chicken for the Hubs & my visiting Mom in Law.

Directions

  1. Take your pita's out of the bag
  2. Spoon some sauce on top
  3. Cover/Smother in cheese (or just sprinkle if you are an odd ball and don't love cheese!)
  4. Add some veggies
  5. If you like meat, throw that on as well
  6. Bake for like 5 minutes at 350 (it's my default temp for anything that doesn't have a real recipe)
    1. You just want the cheese to melt and everything to warm up.  The meat should already be cooked.
  7. Slice it into four pieces with an official looking pizza wheel
  8. Serve with a salad
    1. Easiest salad ever- bag of baby spinach, one sliced avocado, spoonfulls of "3 bean salad" mixture with a bit of the juice poured as "dressing".  Top with Parmesan.  Done.

Easy Examples of our favorite Pita Pizzas!

Sauce Options
  • me = pesto in a jar
  • Hubbs = squeeze pizza sauce!  I'm guessing you moms are very familiar with the product :)
Toppings
  • me = Deli sliced Havarti (I actually AM fancy!)  Bell peppers and spinach. 
  • Hubbs = shredded cheddar & mozz mix straight from the bag!  Diced chicken that he bought already cut up from our awesome grocery store deli dept.  And four spinach leaves to make it look artistic.


Now tell me that doesn't look spectacular and very gourmet compared to the English Muffin standby! 

And for those of you with more time and who want to actually BE a little more fancy with there pizza creation, check out my friend Nicole's blog, The Junk Free Chef, for her Grilled Summer Whole-Wheat Flatbread recipe.  Unlike me, she actually IS a real life chef, knows how to cook amazing things, and has all the fancy gadgets.  She is awesome. Totally my food hero.

But seriously the possibilities are endless.  And each family member can have their OWN personal pizza without much effort.  What do you have in your fridge?  Deli Ham- add some pineapple.    Left over ground beef from taco night- add olives.  Pepperoni- do I even need to suggest?  You can also try to get "fancy" with it.  That Peach salad I made- use the left over slices of fresh mozzarella on top of red sauce.  Once out of the oven, throw arugula on top and sprinkle with olive oil and pepper.  It is such a simple dinner to make and takes 10 minutes tops.  Easy Peasy!

And since I have no shame, here are a couple cute pics from the wedding!  Congrats Nicole & Tony :)


Thursday, June 20, 2013

Pack a Picnic!

It gets hot here in the summer.  Like days upon days in the high 90's or over 100.  Hubby is not a fan.  And we don't have a pool.  And nobody is excited to heat the house up by turning on the stove or the oven.  But we are lucky enough that a quick drive up Hwy 50 takes us into the beautiful Sierra's and many spots to escape the heat and enjoy the scenery.


In May, we celebrated Josh's birthday "month" every chance we had.  You only turn 40 once!  We took a week off of work to relax, explore, and just spend quality time as a family.  Mid week, we embarked on a day trip to one of our favorite spots, Hope Valley.  We've camped up here, had picnics, and explored nearby Blue Lake many times, sun & snow both.  Hudson loves to chase bugs in "our" meadow and to swim in the river.  It's peaceful and absolutely beautiful.  We were the only people there and had these gorgeous views all to ourselves.
It was a little cold & windy (and by little I mean freezing) in Mid May and I was glad I had an extra sweatshirt and blanket.  But it was still a great trip, a short drive, and a nice day with my boys.


Picnic Ingredients

  • For me-
    • Fresh Hummus with lime and cilantro from the Nugget deli
    • Roasted Garlic & Herb crackers that I had in my pantry
    • Sliced Mandarins (cause I don't eat them or their grody pulp, I just suck the juice!)
    • Baked Veggie Chips
    • Honest Tea
  • For him-
    • SABLT wrap from the Nugget (Salmon, avocado, bacon, lettuce, tomato)
    • Hawaiian chips left over from Mothers Day lunch
    • Sliced Mandarins (cause he puts up with my weirdness)
    • Mexican Coke in a bottle 
  • For us Both-
    • bite sized Reese's & Kit Kats

Directions

  • Ummmm.. eat!
  • Enjoy the view


 And this beautiful place is the reason we are able to tolerate it when the temps reach 107...  ugh...


Wednesday, June 19, 2013

Barley, Peas & Lentils...Oh My!

After work last night, I was not in the mood to do anything except change into comfy clothes, sit on the couch, and bust open a bag of gummy bears.  And I did JUST that.  After I made dinner of course :)  I needed something quick and easy, which if I'm being honest is really no different than most things I cook.  So I decided to try this mix of grains that I bought from Raley's recently.  Had a cute little note on the bag that says "Cooks in 10 minutes!"  Yeah! 

But they lied.  Totally lied.  Worthy of a Liar, Liar, Pants on Fire...  This was not ready in 10 minutes.  And the grain mixture didn't even cook at the same time.  Annoying, but whatever.  Have to go with it at this point and just meant I spent more time stirring the pot.  And I ate peas that were a bit "al dente!"  Despite that little issue, this turned out surprisingly well for something I just made up.  Even Hubs liked it.  So I think it will be a keeper even though I'd like to hold a grudge about the 10 minute label.


Ingredients

  • 8.8 oz package of Raley's Barley, Peas & Lentils mix
  • 5 or 5 1/2 cups of water, or broth  (The directions on the package actually call for more but I wanted it to cook like rice and have no remaining liquid.  Used 6 cups of water, and still poured some out at the end.  shrug.)
  • You choose spices
  • You choose veggies
  • You choose meat
  • You choose other garnishes- cheese, green hot sauce, etc.

Directions

  1. Season your water.  Because of the veggies I chose tonight, I wanted to keep it simple
    1. Garlic Salt
    2. Pepper
    3. Oregano
  2. Get your barley mix on the stove before you do any more prep, because it WILL take more than 10 minutes.  I'd suggest leaving it on boil for a longer time before reducing to simmer.  And then simmer longer as well.  Go with twice as long as stated on the package.  In general you are going to have to test it as you cook until it is the texture you want.  Keep in mind my previous note about the peas still being less cooked than the barley...  I ended up cooking this about 25 minutes before I was just OVER IT and decided it was as done as it was gonna get for the night.
  3. While that boils, cut up your veggies.  I used the following-
    1. 1 chopped green onion  (Probably would use 2-3 next time)
    2. 1 cup chopped arugula
    3. 1/2 orange bell pepper- chopped
  4. Saute any veggies that you want to be warmed up
    1. Bell Pepper went into my pan with a little bit of olive oil
  5. Meat lovers- get your meat chopped & cooked.
    1. Pepper Turkey lunch meat was chopped up for Josh.
  6. Get Garnishes ready- We used the following
    1. Shredded mozzarella
    2. Green Tabasco (for him)
  7. Once barley mixture is done, spoon into bowls and mix in as much or as little of all the good stuff.

 
How GOOD does this look for an unplanned and annoying meal?
As with most packaged foods, this was more than enough for two people.  I had left overs to take to lunch at work the next day.  Threw some arugula in a container, spooned in some barley mix, and topped with shaved parmesan.   (Here is me enjoying it during a conference call with East Coasters who always invade my lunch time!) 

Next time I think I would try this mix as a cold salad with greens and zucchini slices, topped with a fresh lemony dressing like this simple Martha version here. 

                  Long Story short- This turned out successful despite such misleading label info!

The famous Dutch Babies!

I have this recipe courtesy of my mother-in-law, Jan.  I'm pretty sure it is one of the first breakfasts she made for me.  Probably the day after I walked ten miles in the snow (for reals) to spend my first Christmas at her house.  I pretty much was spoiled that entire trip...well after we made it there without becoming the next "made for Lifetime movie."  But this has become such a normal part of life that I can't recall just when I was introduced.  It's like I've always known these "babies" existed.  (Sorry, couldn't resist that obvious and awful little play on words.)


Ingredients

  • 4 eggs
  • 1 cup of flour
  • 1 cup of milk
  • 1 cube (yes, a cube) of butter
  • Topping of your choice
    • syrup
    • powder sugar
    • frozen (or freshly made) strawberries and sugar (aka strawberry goo!)
    • Peach jam
    • Cottage cheese and blue berries
    • Lime and season salt (had this version once at a B&B!)
    • Any combination of yummy stuff

Directions

  1. Preheat oven to 375 degrees
  2. Place cube of butter in a 9x13 glass baking dish and let it melt in oven during the preheat.
  3. Mix eggs, flour, and milk in a bowl by hand!!!!  Don't over mix.  Better to leave clumpy than smooth (I have no idea why...)
  4. Remove baking dish from oven and pour batter in the middle, letting it spread evenly with the melted butter getting pushed and pooled on the sides.
  5. Bake for 20 minutes
  6. Cut into squares and serve with a topping of your choice!

Notes-
  • If I can get away with it, I use only half a cube of butter.  It's just too buttery for me but everyone else gets annoyed if I half it...  So you CAN use less butter if you want and if your family allows.
  • The best part of Dutch Babies is periodically turning the oven light on after about 10 minutes  and watching it "grow" at the corners and sides.
  • It will totally deflate when you take it out of the over.  That's just life kiddos.


Monday, June 17, 2013

Taking care of Gma! Two recipes in one...sorta.

Grandma Sue (Josh's grandma) is an active and independent 86 years young!  Last week she fell down some stairs and broke her shoulder.  Ouch!  Jan stopped at our house on her way down to Morro Bay and I sent a little care basket down with her.  A little love in the form of muffin meals.


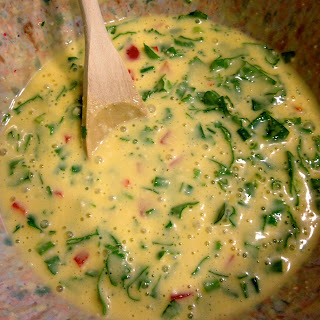
I've made many versions of this over the years.  Started with an awesome recipe that Miss Carrie sent to me for her "Queso Con Juevos" and has morphed with each time I've made it.  After my dad's stroke I turned this into a "muffin meal" recipe that I could make in batches and freeze for the oldie olds.  This made it quick and simple for my mom while she was exhausted from taking care of my dad at the beginning.  We've made it a million times and a million versions since.

The basic ingredients are eggs, Bisquik, & milk.  The measurements don't need to be precise or even CLOSE.  And the addition of whatever you like means you can personalize this to your hearts content.  Or just use what you have on hand.  For me this is a quick way to add a little protein to my day since my diet is seriously lacking!  And it's filling as a quick breakfast.  Perfect for traveling, for camping, for care packages, or for right now!

For Grandma Sue I made two versions- One for breakfast, and one for quick and easy dinners.  She can absolutely manage microwaving these with only one working arm and it will be one less thing for her to deal with.  Total easy "get well" food.  

The breakfast recipe has twice the amount of eggs so that it is...well...more eggy!  The dinner recipe uses a slightly different "technique" but seriously it's practically the same.  Each makes enough for roughly 12 muffins.


Breakfast Egg Muffins 

Ingredients

  • 4 Eggs
  • 1/2 cup Bisquick
  • 1/2 cup milk
  • 1/4 cup frozen hash browns
  • 1/3 cup shredded cheddar
  • 1/3 cup shredded mozzarella
  • 1/4 cup chopped green onion
  • 1/2 cup chopped arugula
  • 1/2 cup chopped bell pepper  (I used red cause it shows up best!)
  • 1/2 cup chopped ham (I used fancy deli slices)

Directions

  1. Mix it all together in one big bowl
  2. Grease a muffin tin (I use room temp butter and a tool I'm pretty sure is intended for putting BBQ sauce on meat...)
  3. Pour about 1/4 to 1/3 cup into muffin cups
  4. Bake at 375 degrees for 20-25 minutes
  5. That's it.  Seriously.


*** I also made this for me and Josh for breakfast the next day.  You can see in the pictures that I added the ham in AFTER the fact to only his muffins.  Just dropped on top and stirred them up a little before throwing them in the oven.  So it's one extra step if your family is like mine and only half of us are vegetarian ;)


Dinner Muffin Meals

Ingredients

  • 2 Eggs
  • 1/2 cup Bisquick
  • 1/2 cup milk
  • 1/4 cup green onion
  • 1/4 cup chopped yellow onion
  • 1/4 cup chopped cilantro
  • 1/2 tsp red Thai curry paste
  • 1 Tbsp lime juice
  • 1/2 cup mozzarella
  • 1 cup chopped, cooked chicken- Use any you have or buy those ready made strips you can get by the lunch meat (I use a Vietnamese flavored chicken breast that we buy in the prepared food section of our grocery store)

Directions

  1. Mix the first three ingredients in a bowl to make your batter.
  2. Mix all of the remaining items in a separate bowl.  I add the curry paste and lime juice together then mix it in so it coats better.  But you don't have to do that step at all.
  3. Grease a muffin tin 
  4. Pour 1 Tbsp into each of the muffin cups
  5. Spoon in about 1/4 cup of the chicken mixture to each muffin cup
  6. Pour another 1 Tbsp on top 
  7. Bake at 375 degrees for 30 minutes
  8. Serve with a side salad and call it a meal.
  9. And again, that's it.  Seriously.


Since you won't eat all of these right away, put them in Ziploc bags (one or two in each bag) for easy reheating later.  I toss them in the freezer and take one in my lunch box for workdays.  By the time I'm ready for breakfast at about 9:00, it has defrosted and I microwave for 30 seconds.  Bon Appetite!


Sunday, June 16, 2013

If you blog it, they will eat! Peach Arugula Salad

This is the salad that inspired me to create this blog!  

(Well, and you girls who comment on my instagram pictures and make me feel like I am a good cook!)

So onto the salad.  THE salad as it will now be known.  I'm in love.  And if I had one, would probably trade my first born for it.  Good thing I have no children.  It's so easy.  Seriously.  And it's delicious.    If I can make it, so can you.  Toddlers, crying babies, and make shift tools...totally doable.

Peaches are currently filling up the produce dept at the Nugget (our awesome grocery store) and smell so good as you walk by.  Since it is already super hot in El Dorado Hills, I wanted to make a nice cool salad with some of the gorgeous peaches.  Our current favorite salads always include arugula.  So off to Pinterest to search "Peach and Arugula."  And voila, I find this.  Serves 4


Ingredients
  • 5 peaches (NOT white cause they fall apart too easily)
  • 3 green onions, sliced
  • 1/4 cup chopped fresh cilantro
  • 3 Tbsp honey or Agave nectar
  • 1 tsp salt
  • 1 tsp lime zest (I skipped cause I don't have a zester)
  • 1/2 cup fresh lime juice (I used way less- juiced one half a lime)
  • 3/4 tsp ground cumin (Used half the 2nd time we made it.  Hubby found it overwhelming, I had liked it.)
  • 3/4 tsp chili powder
  • 1 1/2 tsp tequila (Skipped cause it was more trouble than it was worth.  Save your tequila for Margaritas later...)
  • 1/3 cup olive oil (or the amount you want to create a consistency to your liking.  I used less.)
  • Cooking spray or oil for your grill
  • Baby arugula, thoroughly washed (I buy organic, ready to eat, washed 3x's, plastic box.)
  • 1 lb fresh mozzarella
  • Optional- Prosciutto for you meat lovers

Directions

  1. Chop one peach.  Cut around the pit into small cubes for the food processor later.
  2. Combine the cut peach, onions, cilantro, honey/agave, salt, lime juice & zest, cumin, chili powder, & tequila in a food processor for 10-15 seconds.  Add in olive oil gradually and blend to create the consistency you want.  (I did not use a full 1/3 cup.  Probably less than 1/4 cup.)  If you make this ahead of time, just throw it in the fridge.  The flavors will set up overnight and be great by the next day.
  3. Slice the remaining 4 peaches into nice even slices for the grill.  Cut inward from the sides until you reach the pit.  Cut one side, then the opposite, then the two "ends" that this creates.  You'll have pretty round slices as well as strips from the short sides.
  4. Brush both sides of the peach slices with a little of your dressing.  Set aside.
  5. Slice the fresh mozzarella rather thinly.  The "real" recipe says 1/4 of an inche but I don't even know what that looks like without a ruler.  Just slice them as thick as you want.
  6. Coat your grate or grill with cooking spray or oil (I used olive oil) and place on stove or grill.  Heat on medium to high heat.
  7. Grill the sliced peaches about 3 minutes per side, allowing grill marks but not burning.  *Note- peaches have lots of sugar and it might get a little sticky and messy on your grill.  Don't fret, just flip the best you can.
  8. Arrange the arugula on your plate or bowl, drizzle with some dressing, and add slices of peaches and mozzarella.  Top with more dressing and dig in.  
    1. If you need to be fancy, then stack slices of peaches and mozzarella alternatively.  But since you won't EAT it like that, just put them on top of the greens!
  9. For you meat eaters- cut up some prosciutto slices and sprinkle on your finished salad.


  1.   
This should take less than 30 minutes total.  And if you wanted to prep the dressing the night before (while the kiddos are in bed) you could whip this dinner up in 15 minutes.  Simply cut the peaches, grill them, and plate.  Enjoy with a glass of wine, maybe some rustic bread, and it's a prefect dinner for a hot day.

Voila!  You have food :)